This is a follow up article to my previous post on the NAS upgrade to the Biostar FX9830M motherboard. As soon as I received all required components, I spent the first available evening to assemble the new setup. As mentioned previously, I decided to utilize my old InWin BM639 case instead of buying a new one to save the costs. In the end, I believe, it may even stay as a permanent solution, since I am pretty satisfied with the end result. My final setup is:
- Biostar FX9830M motherboard with AMD FX-9830P Bristol-Ridge APU/CPU.
- 2x G.SKILL F4-2666C19S-8GNT 8GB RAM (16GB RAM in total).
- Kingston HyperX FURY SHFS37A/240G SSD for the system OS.
- 2x Toshiba MG04ACA600E 6TB hard drives for the data.
- Dell QLogic 57810 dual port 10Gbit SFP+ network adapter (Dell 540-BBGS) attached to switch using passive copper DAC cables.
- InWin BM639 case with 160W (IP-AD160-2) PSU.
 |
| Dell 540-BBGS 10Gbit SFP+ network adapter |
Motherboard placement to the case
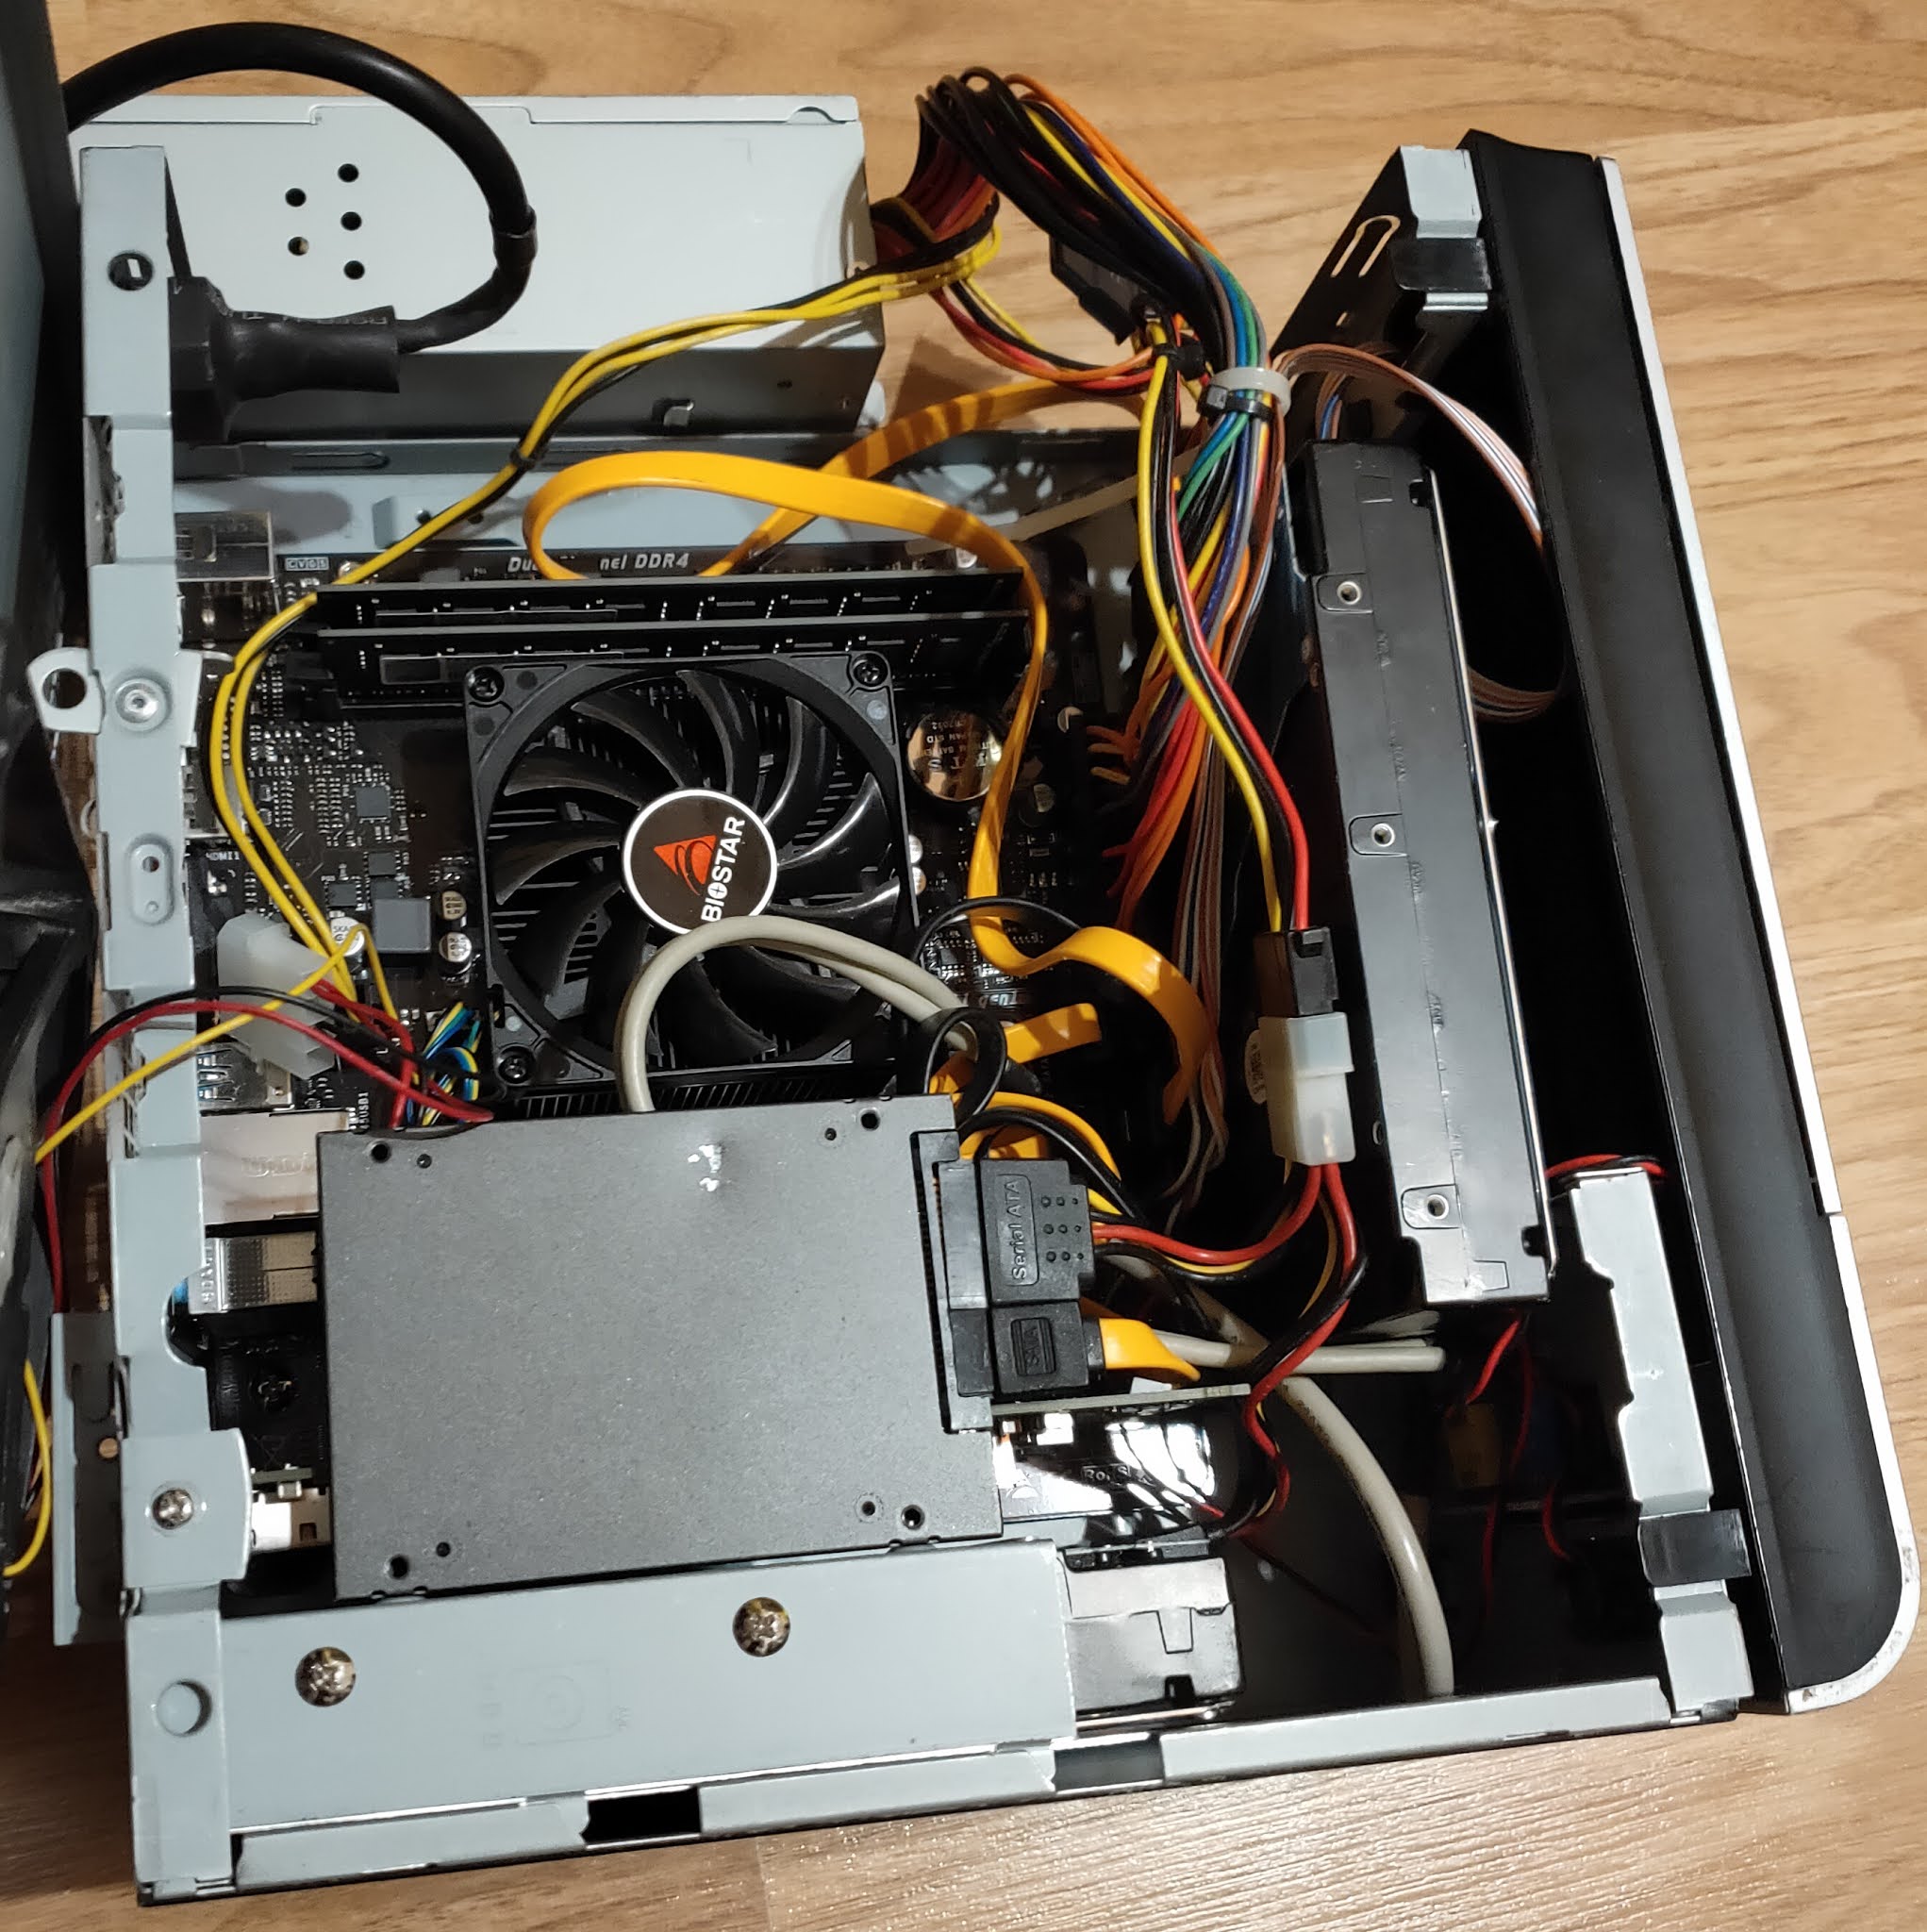
I hit the major obstacle as soon as I tried to place the motherboard inside the case. It is 1.3 cm wider than mini-ITX/mini-DTX standard, thus it was hitting internal PSU. The case hadn't enough space in between to fit. Fortunately, it provided an option to remove just the top part of the case, which gave me an opportunity to exchange the PSU position on the top of the case instead. The stability of such placement comes from the fact that cables are connected pretty tight to motherboard and the PSU has a slide at the bottom by design, which allows to fix it at one corner of the case. It is a workaround and it is not the best solution definitely, but it works pretty well. Once PSU obstacle was solved, the motherboard fit in perfectly. PCIe interface occupies the second extension slot by design, thus only single slot cards can fit (though, by removing HDD cage, likely two slot low profile cards can be used). There are possible alternatives for PSU placement as well I believe to avoid the external placement, but they likely require some modifications to the case. I may investigate those options some time in the future.
 |
| Biostar FX9830M VER6.0 motherboard |
Placing the hard drives
The second obstacle was to fit two 3.5'' hard drives and one 2.5'' SSD inside. By design it has one 3.5'' cage for HDD. Besides that, it was supposed to have the 5.25'' ODD cage as well, which occupies a big part of the front side of the case, however I likely lost it over the years (I replaced it with the big fan years ago). Because of this, I needed to think out of the box a bit on how to utilize space and, if possible, to avoid external placement. Regarding the SSD drive, I was initially planning to replace it with the Sandisk Extreme Pro 3.0 USB flash drive placed internally using USB 3.0 pin header, but it appeared that pin header is protruding too much to the left, thus hitting the CPU fan. What is more, I wasn't sure if flash drive is not too long vertically as well. Because of this, I decided to stay with Kingston SATA SSD. It had its own challenges because of physically damaged SATA port, but I successfully placed it vertically on top of 3.5'' cage by using holes designed to fix 2.5'' drive. Vertical position was required to avoid the bending of drive's SATA port by the rounded metal edge on the top of the HDD cage. Fortunately, this position wasn't obstructed by the network card as well, though it makes access to it a bit more complicated. The first HDD was placed in the cage itself as designed by the motherboard, thus it didn't pose any issues. Finally, I fixed the second hard drive on the original position of the PSU by fixing it with two screws on a back side frame of the case. Thus, all the drives were successfully placed inside the case, leaving only PSU outside of it. In theory, I still can even add one more drive on the front side instead of the front fan. It may affect the airflow inside the case though, because of this, such setup would need careful testing, especially in the summertime.
 |
| Toshiba MG04ACA600E 6TB HDD |
As a side fact, two SATA ports are provided by the CPU chipset, another two by ASMedia ASM1062 controller. Non of them provide RAID support. Like I mentioned before, the second SATA port is also connected with the NVMe slot, thus only one of them can be used at the same time.
Network card needs low profile bracket
The final issue was caused by the fact that Dell network card wasn't supplied with the low profile bracket, though it is easily replaceable by the design (standard screws are used). Because of this, I needed to order one from the eBay, while placing the card without it temporarily. I was concerned if it would not easily pop out of the PCIe slot, luckily, however, it stayed very firmly in the position even during cable insertion/removal process.
The final arrangement can be seen in the picture below (before cable management):
Software adjustments
Software wise the Artix Linux didn't boot out of the box, but it was solved simply by recreating initial ramdisk environment, which had also been the typical way to resolve an unsuccessful update process in the past. To my surprise, the SSD drive worked very stable on the new system, despite its damaged SATA port. I didn't experience any boot issues, I could use all the HDD utilities like smarctl, hddtemp without causing system to stall! What is more, it finally utilized its full bandwidth potential, which was very noticeable during upgrade process.
As initially planned, I replaced NetworkManager service with the dhcpcd and netifrc combination. It was a pretty simple procedure, since only /etc/conf.d/net file required few additional lines to setup bonding interface by the provided example. Once network was ready, I tested copying files between two systems with 10Gbit network, it reached around 165MB/s, which is considerably better than previous speed ranging from 40 to 70MB/s depending on network controller, but likely limited to hard drive capabilities. Because of this, RAID0 setup may be beneficial to increase download speeds even more, just it doesn't seem necessary for me currently. It is also easy to notice snappier file browsing experience. Additionally, I used iperf3 network testing utility which reached ~6.25 Gbit/s between two systems.
 |
| iperf3 testing results |
Finally, I could remove all the workarounds applied for the previous system, including enabling the kernel updates again.
BIOS
The motherboard uses UEFI BIOS with the typical graphical setup controlled by keyboard or mouse. It does not provide as much options as as you may expect from usual desktop gaming motherboard, but it has some specific options which are likely suitable for a business environment and power users (TPM, security, virtualization). For my specific case, I probably mainly missed more controls over fan speed and other power saving features. The motherboard fan is usually very silent but can become noisy on high CPU usage. Also, I didn't find an option to disable main AUDIO device (Realtek ALC887) (except the one from the GFX device). Dell network card supports EFI, thus I changed Network device to prefer UEFI boot instead of legacy one. BIOS provides an option to choose boot device by clicking F9 or enter BIOS flasher with F12 (no BIOS updates are available as of yet). In general, it is still an improvement over old legacy BIOS in Jetway motherboard but may disappoint more demanding people.
I also made a mistake, once I disabled internal NIC controller. It changed link's enumeration number from enp3 to enp2 which I failed to notice initially, thinking it's a possible BIOS bug and reporting it to Biostar. Actually, only simple network reconfiguration was needed.
 |
| FX9830M BIOS main screen |
Conclusion
In conclusion, the full upgrade process from the hardware side to the software one went quite smoothly. The motherboard proved to be almost compatible with the Mini-DTX cases, with the PSU placement being a major concern. In my case, I resolved it quite easily due to highly modular case design. The final result is considerably stable and faster system with the big potential to utilize it in few different ways, which were not possible previously. I still plan several improvements like data encryption and cold backup in the near future. I am also waiting for the low profile bracket for the network card and a low profile COM bracket which will occupy the upper empty slot (I use serial console in some occasions) to complete the setup. Considering the successful setup with the InWin BM632 case, I started to have doubts about the need of replacing it with Fractal Design Node 304 or similar case, as I initially envisioned. I believe, I will likely look into all other options first before doing such purchase. As of today, the main concerns are to reintroduce double backups, better secure the data and utilize the new system for routine actions which I am doing either manually or using scripts. And hopefully, the system will serve me no less than the one it replaced!