Showing posts with label Jetway. Show all posts

2020-10-27

NAS upgrade to Biostar FX9830M board

Intro

Despite my recent projects and various minor hardware updates on the old NAS server, which you can read about in my previous blog posts, I have been already looking around for the major hardware update. I was not sure how long the search will take due to reasons I will explain shortly but the aging system was being pushed to its limits and it was only a matter of time before stability, performance, requirements, and other factors will start to drift away from the reasonable levels. In addition to those factors, I was constantly upgrading my other hardware, including gradual upgrade to 10Gbit based local network. Better utilization of it outside simple technology playground and testbed,  were complementing motivational factors to spend additional resources on NAS modernization, which would allow me to focus on its main purpose instead of putting most of efforts for workarounds and patches just to keep it running reasonably well. 

Inside Jetway JNF-76 based NAS system

The search

The market changed quite a bit since the time I bought Jetway JNF76 back in 2009. Introduced by VIA Technologies mini-ITX form factor was still quite strong, various solutions were available ranging from home to industrial/embedded market. Specialized online computer shops selling such hardware were still in business. Once I started looking for the new board a year or so ago I noticed that most of the stores I've used to buy such products are either gone or their business transformed into different directions. VIA Technologies itself also generally left the consumer market and x86 CPU business (I know that they have joint venture in China, but those solutions have zero availability outside China and I don't associate them directly with VIA anymore. As a proof of that, just recently VIA announced plans to sell its part in the joint company). It's not that the market completely vanished, there are new stores which sell similar products in the sea of other stuff but they are not that focused and specialized as before. On top of that, ARM based solutions started to push into small PC market but I am not completely ready to go in this direction yet and they usually don't have required specifications. Finally, this time I really limited my budget which forced me to look to home/end user solutions instead of ones server/embedded ones. Unfortunately, in this space motherboards surprisingly went away from mini-ITX form factor besides few pretty expensive gaming focused solutions or very cheap Atom CPU based ones, which have quite limited specifications. Mini-PCs seemingly moved mainly to custom size barebones or NUCs. Because of this, the right solution was really extremely hard to find with the requirements I expected to fulfill:

  • At least 4 SATA III ports
  • PCIe 2.0 x8 electrically (not just a physical slot)
  • Energy efficient CPU, preferably soldered to motherboard and passively cooled.
  • At least two USB 3.0 or higher ports
  • Ideally mini-ITX form factor
  • Small price (< 200 euros)
  • Readily available

Biostar FX9830M motherboard took my attention as soon as it was announced early spring this year. It looked almost like an ideal solution, having PCIe x16 slot (x8 electrically), 4xSATA ports + M.2 slot, 2xUSB 3.0 (marketed as USB3.2 Gen1) plus internal header for 2 more. It checked most important ticks with some caveats: 

  • Adding SSD drive to M.2 port disables one SATA port, thus making me to choose between setup of 4 hard drives + USB 3.0 system drive or 3 HDDs + 1 fast system SSD in the M.2 port.
  • SATA controllers do not support RAID.
  • AMD FX-9830P CPU TDP is 35W, which is a bit high (VIA U2300 is 5W TDP CPU + 5W for VX800 chipset). In addition, it is actively cooled.
  • Serial port is not available in the backpanel (COM header exists though).
  • Actual availability was completely missing till early/mid October both in my country or in the international online stores like Amazon. By the time of writing, it is still looks scarcely available, at least in Europe.
  • The worst issue that I initially overlooked, that it is not mini-ITX form factor board, but a little bit bigger one, having 200mmx183mm dimensions instead of 170x170mm. 

Nevertheless, once I finally found a very small batch of these motherboards available in the local computer and electronics shop few weeks ago, I didn't hesitate much and decided to build new NAS system around this model. I deemed the points mentioned above non significant to my envisioned setup and adjustable in one way or another. The price of the board was a bit above 100 euros.

Biostar FX9830M motherboard

Overcoming the size issue

The motherboard size is not a microATX as claimed by Biostar, thus I did some research if it can fit some small cases (bigger than current one but smaller than microATX). It almost conforms with mini-DTX size, but requires extra 1.3cm width, since mentioned form factor size is 203x170 mm (width matches with mini-ITX). Since the motherboard doesn't conform to any actual form factor, Biostar simply labeled it as microATX one, though full size microATX (244x244 mm or 4 expansion slots) case would be definitely a waste. It would definitely fit into DTX case but this AMD proposed form factor didn't gain popularity, thus marketing team probably decided to avoid mentioning it. Considering the size of the board, it became clear that it likely fits into some mini-ITX cases with two expansion slots (considering the mentioned a little extra width is available which may not be always the case). Fractal Design Node 304 solution seems to be one of the best options to consider, since it officially supports mini-DTX and can accommodate up to 6 hard drives, which is perfect for my NAS server needs. From the videos and photos available I am not completely sure if extra width won't be hindered by PSU frame, but the frame looks removable in the worst case (combined with SFX/TFX/picoPSU instead of traditional ATX one). To save initial costs though, I decided to utilize my old InWin BM639 case, which was used for my VIA EPIA-M900 board based computer in the past. It happens to have two slots and fits the board with some workarounds.

InWin BM632 case

The network setup

As mentioned before, one of the main motivational reasons was ability to utilize local 10GBit network. This decision was accelerated by few important recent purchases. The major one was MikroTik CRS309-1G-8S+IN 8 port SFP+ 10Gbit switch. It was supplemented by Asus XG-C100F Aquantia AQC100 based SFP+ network adapter. The Asus card was important because it is supported by NetBSD (and FreeBSD). It enabled me to completely switch to 10GBit interface on my main computer. In addition, I have previously acquired Dell QLogic 57810 10Gbit double SFP+ port Ethernet card. This particular network adapter will be transferred to NAS server, thus it dictated the requirement for PCIe 2.0 x8 slot. Since it has two ports, network aggregation can be utilized in similar manner as the current 1Gbit setup (Mikrotik switch supports interface bonding from its side as well). Finally, I still have Tehuti TN4010 based Edimax EN-9320SFP+ adapter bought back in 2018, which allows me to connect one more computer when/if needed.

Mikrotik CRS309-1G-8S+IN

Asus XG-C100F

Storage setup

The original plan was just to transfer my original setup: 2x6TB hard drives plus 2x3TB drives in LVM RAID0 setup for the second backup. Backup drives are initially synchronized using rsync software once a day, though at different time frame for each backup. Unfortunately, just before the purchase of the new board one of my old 3TB HDDs died. Thus, only new 6TB drives will be used from day one. In the future, I plan to go back to the double backup, however I am not sure yet what will be the final setup in this case (I can see few options: manual sync as before, or RAID0+1 setup (using LVM), or separate cold backup using USB3.0 or network). For the system drive I currently planning to switch from SATA SSD, to USB3.0 SSD drive placed inside computer case using Delock USB3.0 pin header. This decision is mainly driven by damaged SATA port on current system SSD drive, which I believe is causing some stability issues. Besides that, initial plan was to utilize all 4 SATA ports by data HDDs until recent failure. 

Software wise the main operating system will stay Artix Linux with OpenRC init system. Additionally, I am planning to introduce full data encryption. Finally, considering the need to configure new network interfaces, I may switch to dhcpcd/netifrc instead NetworkManager for DHCP client and network management to simplify my software stack and use partially familiar tools (dhcpcd is default DHCP client in NetBSD).

Bonus improvements

Very important expectation is increased stability of the system. Though current system wasn't particularly unstable once booted, but it had serious issues on the boot process itself, mainly because of ADPE4S-PB daughterboard and likely also because of damaged SATA port on system SSD drive. It was partially circumvented by using my very old external PCI SATA controller but it had limited system performance (theoretically SATA I but in practice twice or more slower because of drivers), still wasn't 100% stable and had limited expansion capabilities. FX8300M motherboard has mature AMD platform which is well supported by Linux kernel, thus stability should not be an issue anymore. Same applies to Dell network card which I have tested in my personal computer for several months. As a bonus, much higher CPU performance will allow me to focus and NAS related configurations (encryption, NFS, samba, RAID) and various additional background services and scripts (rsync, fossil-scm, git, torrents, streaming, filtering, folding@home at certain occasions, etc). Additional perks include more modern UEFI BIOS with reacher configuration and boot options, possibly higher hard drive capacity support (though I haven't hit the limit with JNF-76), USB 3.0 for additional flexibility on external storage, SATA 3 instead of SATA 2 (VIA chipsets have never upgraded to SATA 3 for some reason). Very fast PCIe 3.0 based SSD in M.2 slot is also an option for system drive in the future, that is in case I won't need all 4 SATA ports. And finally, the board supports up to 32 GB of RAM (initially opted 16GB), which should be more than enough for NAS server including any additional services. I really hope to use this system for similar timeframe as original one, which is around 10 years or more. 


I am planning to write a follow up article once setup is ready.

2019-12-07

LVM RAID on Artix Linux

This is a follow up article to activities started with the migration from Arch Linux to Artix Linux distribution. Since the switch over to OpenRC based distribution was successful, I decided to move on with hardware changes soon after.

Motivation

The major goal was to reuse the replaced 3TB hard drives into RAID0 setup as additional backup storage, those combined capacity would match to newly acquired hard drives. I faced some challenges during implementation:
  • Akiwa GHB-B05 Mini-ITX case can only physically fit two 3.5'' hard drives, and both places were already occupied by the main two hard drives.
  • There are only two SATA connectors available on the Jetway JNF-76 motherboard.
  • I wanted to keep using network aggregation, thus I need to have two Ethernet ports available. The motherboard has only one, though.
  • If possible, I wanted to avoid additional expenses or keep them to a minimum.

The plan

To remedy the space limitation issue, I decided to place the hard drives outside instead, by reusing my external hard drive box and HDD radiator designed for 5.25'' bay for each hard drive accordingly. Both, the box and the bay provided a stable vertical position and can be placed close to the case, making it accessible to cables from inside the case. I have accumulated all the required cables throughout the years, so no additional purchases were needed.

To get additional SATA ports I was forced to replace my AD3INLANG-LF LAN expansion daughterboard with the ADPE4S-PB Marvell SATA controller (it is based on Marvell 88SE6145-TFE1controller). I was a bit reluctant about this decision, since I was facing constant boot issues in the past with it. It also needs special configuration to make it work on Linux. Moreover, the Jetway proprietary daughterboard connector makes it challenging to insert the board firmly. Finally, loosing LAN ports meant that I can't use network aggregation without additional PCI card. However, the only alternative was to buy a new PCI SATA controller with at least 3 SATA connectors, which is getting harder to find and the prices are not too attractive in my region. Additionally, it's hard to predict if such decision won't bring new problems along the way. So, I decided to go with the daughterboard exchange.

In order to keep network aggregation possible I needed to do one purchase. Since Intel PRO/1000 GT PCI network card from my stockpile is not compatible with the ADPE4S-PB daughterboard due to firmware clash, I needed to buy another one without network boot support. For that purpose I acquired the D-Link DGE-528 (Rev. C1) network card which is based on Realtek RTL8169SC NIC. It costed me around 7.5€ and kept the goal for minimal spendings.

Additionally, I reused one back plate panel containing 2xSATA to eSATA connectors with one 4-pin Molex power connector, one SATA and one eSATA to SATA cable. All of them I had in the pile of my parts.

Assembly

Initially, I made sure that I have enough power cables and I can extend them long enough outside the case, so that hard drives would stand vertically, stable and still with enough room for cables not to be stretched. Fortunately, I still had one free Molex connector, which I used to connect the back panel's power connector. It made it extremely easy to connect one of two hard drives, since both power connector and eSATA connector were redirected outside the case. However, the second one couldn't be connected in the same manner, because it needed one more power connector. Fortunately the PSU had four SATA power connectors, out of which one was long enough to go outside the case and reach the hard drive. So in the end, I had all four PSU's SATA power connectors used (1xSSD, 3xHDD) plus one Molex connector used for the back panel's power cable extension (1xHDD). The back panel also provided ability to attach one of the hard drives using eSATA to SATA cable. Since I had only one such cable, I used long SATA cable to attach the second hard drive from inside of the case.

Externally placed hard drives cabling
Once cabling was finished, I spent quite a long time to properly attach the daughterboard itself. Like in the past experience, the boot process was very unstable, but after multiple attempts I reached a quite reasonable stability with most of boot attempts successful. Unfortunately, I noticed one regression over Delock controller: attempts to read Kingston SSD temperature with hddtemp utility was causing it to fail (with the reboot required).
Cabling at the back plane

The easiest part of the assembly was attaching D-Link network card to PCI slot and cable cleanup. As expected the DGE-528 didn't clash with the daughterboard and it is well supported by Linux. Integrated SATA controller needed to be switched to IDE mode to avoid the clash as well.


Hard drives in external casing

RAID0 Configuration

The main goal was to setup two 3TB hard drives into RAID0 mode, so that they will be available as one virtual 6TB drive. This volume would match with my newly bought 6TB drives and act as yet additional backup storage. To achieve this, I tried to use Marvel firmware first, but unfortunately it was freezing up on RAID creation attempt. I couldn't figure out the reason, but it didn't seem like it was a capacity limit, since 6TB hard drives were detected by the controller without issues. Some drive incompatibility looked like more plausible explanation but I had no means to test and verify my assumptions. As a consequence, I decided to try to setup LVM managed RAID instead. Using two sources from Gentoo Linux wiki and Red Hat Linux documentation I successfully configured my LVM RAID0 by using these commands:
  • Install and start LVM service:
    • sudo pacman -S lvm2 lvm2-openrc
    • sudo rc-update add lvm boot
    • sudo /etc/init.d/lvm start
  • Create LVM physical volumes and volume groups
    • sudo pvcreate /dev/sda1 /dev/sdc
    • sudo vgcreate nasbackupvg /dev/sda1 /dev/sdc
    • sudo vgs #to check
    • sudo vcreate --type raid0 -l 100%FREE -n nasbackuplv nasbackupvg
  • Format and mount volume using XFS filesystem:
    • sudo mkfs.xfs /dev/nasbackupvg/nasbackuplv
    • sudo mkdir /mnt/raid
    • sudo mount -t xfs /dev/nasbackupvg/nasbackuplv /mnt/raid
  • Edit /etc/fstab by adding the line (in order to mount volume on boot):
    • /dev/nasbackupvg/nasbackuplv            /mnt/raid    xfs    defaults,relatime    0    4 
Once RAID setup was ready and working, I also edited my rsync scripts to accept destination path and updated my crontab configuration to sync with the new mount point. With this step, the goal to reuse hard drives for backup was successfully achieved.

I also performed some performance metrics of all attached drives:
  • sudo hdparm -tT /dev/sdX and dd if=/dev/zero of=output.img bs=8k count=256k:
    • Seagate 3TB (attached to Marvell controller)
      • Timing cached reads:   1000 MB in  2.00 seconds = 500.18 MB/sec
      • Timing buffered disk reads: 320 MB in  3.00 seconds = 106.52 MB/sec
      • 2147483648 bytes (2.1 GB, 2.0 GiB) copied, 39.3878 s, 54.5 MB/s (for RAID setup Toshiba+Seagate)
    • Toshiba 3TB (attached to Marvell controller)
      • Timing cached reads:   1002 MB in  2.00 seconds = 500.75 MB/sec
      • Timing buffered disk reads: 326 MB in  3.01 seconds = 108.44 MB/sec
      • 2147483648 bytes (2.1 GB, 2.0 GiB) copied, 39.3878 s, 54.5 MB/s (for RAID setup Toshiba+Seagate)
    • Toshiba 6TB (both attached to VX800 controller)
      • Timing cached reads:   1012 MB in  2.00 seconds = 505.75 MB/sec
      • Timing buffered disk reads: 528 MB in  3.00 seconds = 175.78 MB/sec
      • first HDD: 2147483648 bytes (2.1 GB, 2.0 GiB) copied, 18.6864 s, 115 MB/s
        second HDD: 2147483648 bytes (2.1 GB, 2.0 GiB) copied, 15.9705 s, 134 MB/s
    • Kingston SSD (attached to Marvell controller)
      • Timing cached reads:   982 MB in  2.00 seconds = 491.40 MB/sec
      • Timing buffered disk reads: 324 MB in  3.01 seconds = 107.47 MB/sec
      • 2147483648 bytes (2.1 GB, 2.0 GiB) copied, 36.0755 s, 59.5 MB/s

Network aggregation

Network aggregation reconfiguration was required as well as a result of hardware changes. Instead of using AD3INLANG-LF daughterboard with three Intel 82451PI network controllers, I utilized the integrated Realtek 8111C controller and PCI attached D-Link DGE-528T network card with Realtek 8169C NIC. The integrated one was named as ens1 and the D-Link one as enp4s3, so configuration was the following:
  • nmcli con delete bond0 # deleting previous interface
  • nmcli con add type ifname bond0 bond.options "mode=802.3ad" 
  • nmcli con add type bond ifname bond0 bond.options "mode=802.3ad" 
  • nmcli con add type ethernet ifname ens1 master bond0 
  • nmcli con add type ethernet ifname enp4s3 master bond0
It worked as expected but the transfer speed reduced to 40-43 MB/s compared to >50MB/s which Intel NICs were usually achieving. Regression was expected and observed in the past, acceptable for current usage scenarios.
D-Link DGE-528T

Conclusion

In general, the plan went quite successfully. I managed to reach all the goals with minimal spendings and effort. They were few issues like multiple attempts to attach daughterboard properly, Marvell firmware RAID creation failure but I managed to circumvent them in one way or another. Some performance metrics are not stellar but they are sufficient for home NAS usage at present day. Though, I believe that it is the last major hardware update around this motherboard, since I am reaching the limits with this decade old platform. The next step would require more modern solutions but by that time the current system will still serve me well.

Arrangement of PC and hard drives

2019-11-01

Migration from Arch Linux to Artix Linux

Recently I reached the point where 3TB hard drivers were getting almost full and I needed an upgrade. As a result, I opted for two Toshiba MG04ACA600E 6TB hard drives which replaced Toshiba DT01ACA300 and Seagate Barracuda ST3000DM001 3TB models. They were successfully recognized by the Jetway JNF-76 motherboard, on which my NAS server is based on. As a matter of fact, VIA AHCI/RAID firmware always properly displays them in SATA II mode (max speed for all VIA controllers AFAIK), which wasn't the case with the previous setup when one of the drives randomly would drop to SATA I. In general, there is nothing to complain about them, hopefully they will be reliable too.

Toshiba MG04ACA600E

This upgrade and few unexpected free days made me rethink both software and hardware configurations again and come back to the original question of the Linux distribution to be used. Probably one additional kick was the news about Project Trident decision to move from FreeBSD-based TrueOS to Void Linux, which made me revisit some light-weight distributions, init systems and file systems. I was even considering to try NetBSD with OpenZFS but quite soon this plan faded away due to lack of experience on managing OpenZFS filesystem. Initial testing showed that I can easily destroy my data and before such a move, I should be really confident with it. Even though I was very much satisfied with Arch Linux setup too, I was itching to try some systemd-free distribution instead, which gives me more natural and familiar way of work. The relatively recent consolidation of Arch and Manjaro OpenRC spinoffs into Artix Linux caught my major attention for the obvious reasons. It is still based on Arch, which provides a more familiar environment, spirit and tools. The distribution officially supports OpenRC and runit init systems. I chose OpenRC one, created migration plan, and started the journey.

First boot

To make sure that it boots and recognizes my hardware, I downloaded the latest artix-base-openrc-20191009-x86_64.iso image which I could find at the time of migration in one of their mirrors. System booted without issues and recognized all the required hardware, pata_via module probably was compiled into the kernel since I didn't need to configure it separately, contrary to the Arch Linux. Setup included JFS and XFS mounting option support which was required for my data disks. It reassured me to go forward since I didn't find any potential setbacks.

The plan

To minimize a potential regression impact, I decided to prepare a transition plan. It wasn't very detailed, since it did not describe all the specific commands but it pointed out general actions I would need to perform:
  • Backup /home and /etc/fstab
  • Backup samba, crontab, modules and network settings.
  • Boot into Artix setup and backup Arch system disk (it has dd included).
  • Install Artix itself
  • Install/configure required software and services: samba, wget, rsync, git, fossil, jfsutils, xfsprogs, rtorrent, lm_sensors, hdparm, hdtemp, ethtool, vim, vi, man, openssh.
  • Restore /home, crontab
  • Configure network
  • Configure mounting points to data drives
  • Install/configure powerd

Migration

The initial step was to prepare backup for all settings, /home folder and Arch Linux system disk itself. Individual settings files were simply copied manually one by one, and /home folder was synced using rsync utility. For the Linux system disk backup I booted into Artix setup and used dd utility together with gzip compression utility to copy all the system disk (dd if=/dev/sda conv=sync,noerror bs=64K | gzip -c  > /mnt/nasbackup.img.gz). This step probably took the longest time wise, preparing compressed image of 240GB SSD drive took way longer than I was expecting (hours). Probably it was related to limited performance of the system itself.

Once all backup were ready, I moved on to the installation part. The Artix installation process was based on the steps from distribution's wiki Installation and Migration sections so I won't go much into details. It was almost smooth process except that the base installation didn't have any editor installed, and this led me to install Vim editor first before I could do any required configuration (right after chroot command). Probably the only mistake by following the documentation was the NetworkManager installation where I should have preferred Gentoo's netifrc modules with dhcpcd utility instead.

Rebooting into the newly installed system gave few more surprises on how minimal the setup was. Even quite basic applications like hostname or man were not available. Though it was easily solved by installing inetutils (for hostname) and man packages using pacman package manager, however, it still felt a bit strange, since I believe Arch base install had more software. The list of my installed packages includes:

sudo pacman -S wget rsync git fossil jfsutils xfsprogs rtorrent lm_sensors hdparm hdparm-openrc hddtemp ethtool vim vi man openssh openssh-openrc samba samba-openrc cronie cronie-openrc powerd powerd-openrc inetutils

Besides that I also installed grub, os-prober, networkmanager and networkmanager-openrc during the initial installation process. However, as mentiond above I may replace NetworkManager with netifrc modules and dhcpcd utility in the future.

As you may have noticed, all services have -openrc counterpart for OpenRC service management. OpenRC service files are installed in /etc/init.d for execution and /etc/conf.d for configuration. After that service needs to be added to a certain execution level (I used default for all) using rc-update add command and they can be started by rc-service start command. Services I have added include:

sudo rc-update add NetworkManager default
sudo rc-update add sshd default
sudo rc-update add smb default
sudo rc-update add cronie default
sudo rc-update add cpupower default 
sudo rc-update add hdparm default

The next step was to configure the network aggregation. Since I installed NetworkManager, I needed to use nmcli utility to setup bonding network interface (ensure that all interfaces are down and leases are deleted from /var/lib/NetworkManager/*.lease before proceeding):

sudo nmcli con add type bond ifname bond0 bond.options "mode=802.3ad"
sudo nmcli con add type ethernet ifname enp4s4 master bond0 
sudo nmcli con add type ethernet ifname enp4s6 master bond0
sudo
nmcli con up bond-slave-enp4s4
 
sudo nmcli con up bond-slave-enp4s6 
sudo rc

With dhcpcd utility it would have been a slightly different story (ensure that all interfaces are down and all leases are deleted from /var/lib/dhcpcd/*.lease before proceeding):

sudo pacman -S dhcpcd dhcpcd-openrc
sudo rc-update add dhcpcd
sudo ln -s net.lo net.bond0
vim /etc/conf.d/net
    config_enp4s4="null"
    config_enp4s6="null"
    slaves_bond0="config_enp4s4 config_enp4s6"
    config_bond0="dhcp"
    mode_bond0="802.3ad"
sudo rc

Finally, I completed my setup by restoring my home folder content, crontab and samba configuration files. Migration ended up to be easy and problem-free. With backup time excluded and ignoring some confusion during network configuration, it probably didn't take me more than few hours of work.

There are some caveats though which I noticed but I am clueless as to the cause and if it actually affects the system in any way:
  • Multiple segfault messages in dmesg (not sure yet, what causes these messages but it doesn't seem to affect any of the required functionality as of result): openrc-run.sh[2008]: segfault at 8 ip 00007fdfbfb890dc sp 00007ffd4de79040 error 4 in libc-2.30.so[7fdfbfb37000+14d000]
  • Warning message for bond0: "Warning: No 802.3ad response from the link partner for any adapters in the bond". This may indicate the router issue or premature warning message, but apparently the bonding interface works correctly (and router indicates it as active).
In conclusion, I can say that the OpenRC init system actually feels more intuitive and simple than systemd, but the maturity of Artix distribution is still not on par with systemd-based Arch Linux. Errors in boot messages, inconsistencies and confusing information in wiki page and even the web page itself are the signs of that. Nevertheless, for my simple NAS server requirements this distribution seems like a perfect fit and I believe I will stick with it unless stability-wise it won't prove itself. Arch Linux was very stable and polished in this regard despite its rolling release nature, I expect no less from Artix as well. If anybody would ask me for a recommendation, I would still recommend using the Arch Linux distribution, unless, that person would prefer using the systemd-free distribution for whatever reason (in that case Gentoo and Void would be a primary choice I guess). Yet, I believe Artix has a potential to become one of the strongest light-weight distributions, especially for those seeking simplicity and freedom of choice.

Planned hardware changes

Though the migration went successfully, I still have some possible hardware changes in mind. First of all, VIA based PCI controller is not compatible with the SSD I am using, which triggers a workaround in the driver to reduce transfer rate to ~60 MB/s:

ata3: Incompatible drive: enabling workaround. This slows down transfer rate to ~60 MB/s

Secondly, I am planning to reuse replaced hard drives as yet additional backup solution in RAID0 setup (which in turn will make them 6TB in total).

Because of these changes, I am considering to revert to using ADPE4S-PB SATA II daughterboard. It means checking its compatibility with Artix (hopefully the same or a similar configuration to Arch Linux will work) but I fear about the boot process stability which improved consideribly once I switched to Delock controller. However, the daughterboard can provide enough SATA interfaces for the system drive and two hard drives without hindering too much to the overall system performance (it is based on faster PCI-E interface and it supports SATA II 3 Gbit/s transfer speed). In addition to that, I will need some creativity on attaching those two additional drives, since I don't have space in mini-itx case anymore. Probably I will need to keep them outside by using some extentions to reach the hard drive SATA connectors. The main concern is that the SATA power connector is too short to go outside the case. I hold my breath on Molex to SATA adapters. For keeping them outside, I will try to reuse my old external 3.5'' HDD cases. We will see how this goes...

To keep the network aggregation I also bought a cheap D-Link DGE-528T (Rev. C1) network card with high expectations that it will successfully work with the daughterboard contrary to Intel PRO/1000 GT card, since it should not have any interfering firmware. It is based on the Realtek RTL8169SC controller, which I would pair up with the integrated Realtek RTL8111C controller. Performance-wise, I do expect some degradation compared to AD3INLANG-LF daughterboard, but this is acceptable.

D-Link DGE-528T
I am planning to write a new article if this project goes successfully.

2018-12-10

Network aggregation project on Jetway JNF76 motherboard


Prehistory

Since my NAS revival project last year, I already had in mind to try the link aggregation feature, which was supported by my router. Initially I expected simply to pair up integrated Realtek RTL8111C NIC controller with Intel PRO/1000 GT PCI adapter as I already had one in the pile of my parts. For this purpose I even bought an Akiwa GHP-PCI106H PCI riser card (I use their GHB-B05 case) which wasn't so trivial to find - it was available in several industrial PC online shops only and, because they communicate exclusively with the juridical entities I needed to go through an intermediate party to buy it. When everything was ready, I believed that it would be a relatively straight forward setup. However, it ended up in a quite longer story than expected.

Akiwa GHP-PCI106H PCI riser card

Initial plan failed

The aforementioned configuration failed immediately after I attached the PRO/1000 GT adapter. I hit an old JNF76 motherboard BIOS issue that expansion cards with their own firmware may clash with ADPE4S-PB SATA II daughterboard, rendering the system completely unbootable. Intel's card had one with PXE boot support. This limitation have never been fixed by Jetway, thus I have no knowledge of any solution to resolve the situation. Unfortunately, it was clear that this configuration was a no go.
Intel PRO/1000 GT PCI network adapter

Looking for new solutions

One hiccup didn't deter me from completing the project though. It pushed me to look for other possible options to go around the limitation. Most likely the simplest way would have been to find another NIC adapter which wouldn't clash with the daughterboard. That meant buying the card without PXE boot support. As a proof of that, I have successfully tested an old VIA based Fast Ethernet (100Mbps) PCI network adapter. Indeed, it didn't clash with ADPE4S-PB on BIOS POST process and it was perfectly working in the Linux environment. Although this option looked quite appealing initially, there were few Realtek based GbE adapters in the market, however their description tended to be vague at times and I felt that I may have ended up buying yet another incompatible card. More than that, the whole link aggregation idea was also a bit risky and it might have left me with the second GbE network adapter buried deep in the pile of old parts. Because of all of this, it made me rethink of the NAS configuration a bit, which would solve another outstanding issue.
 
ADPE4S-PB SATA II controller

Reasoning for ADPE4S-PB replacement

The main reason for the configuration change was the same ADPE4S-PB daughterboard. Besides those clashes with expansion cards and a bit of challenging configuration, I was also experiencing another very annoying issue with it. I used this controller to attach SSD with the host OS only. Relatively soon after I made it work and boot the system, I started to face unstable behavior during the Linux boot process. From time to time Arch Linux was failing to initialize the SSD, forcing me to the reset loop till the successful attempt. Few times I was spending up to an hour on clicking reset button... I haven't figured out the actual reason for this, but it could have been everything from the driver to the bad cable connection (my SSD's SATA plug is physically damaged) or improperly attached daughterboard. It led me to the decision to replace ADPE4S-PB board with the LAN expansion daughterboard instead. I chose an AD3INLANG-LF module which hosts three Intel 82541PI based network controllers, the same used by PRO/1000 GT adapter. It was readily available through amazon but I required some help from a friend in the US to deliver it to Europe. For an SSD drive I decided to use my old Delock PCI USB/SATA combo card.

AD3INLANG-LF daughterboard

Inserting AD3INLANG-LF daughterboard

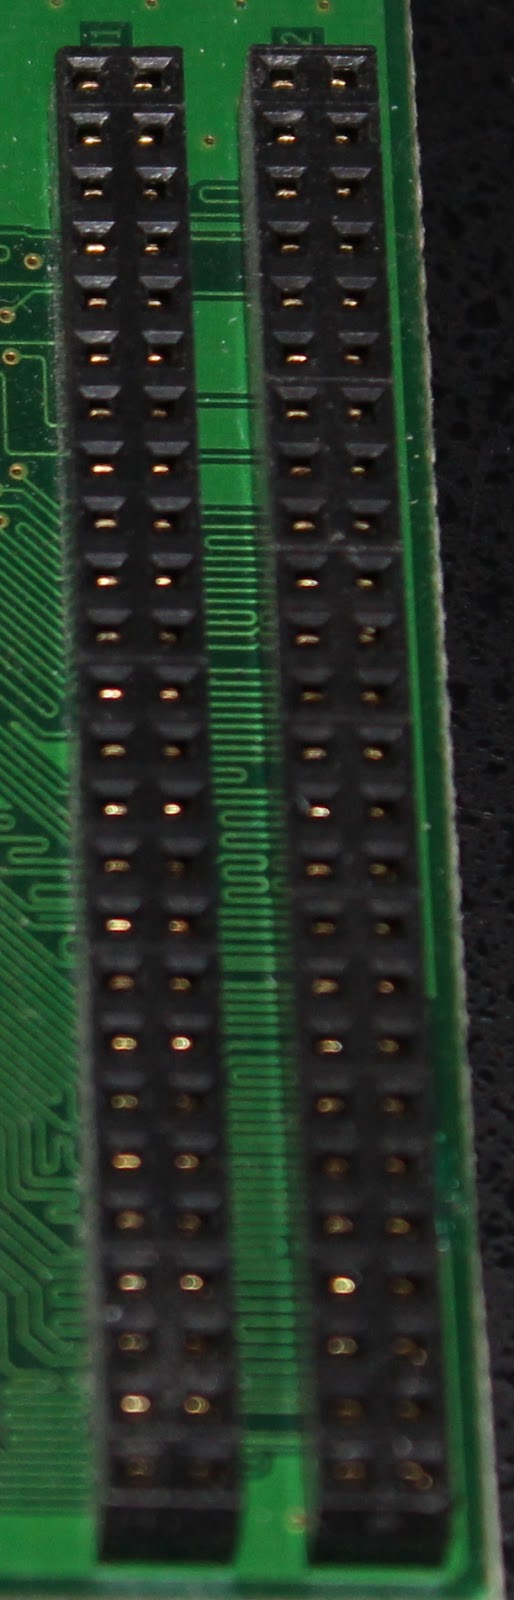
Since I attached the SATA daughterboard many years ago, I already forgot how actually tricky is the process of inserting it to proprietary JWDB header. For some weird reason Jetway doesn't provide the manual and you can find that at least a few people are complaining about the attaching process in product reviews, blog items or forums, some taking even quite extreme measures to make it seat properly. If it's not, the daughterboard either will fail to work completely or it can even light up (for example, green light on LAN port if cable is attached) but non of the interfaces will be identified or initialized in the OS or BIOS. Nevertheless, the actual process shouldn't require much force, using the trial-error approach, I have managed to insert it properly by aligning inner pins (means the ones closer to CPU side) with the plug holes on the daughterboard in a 30-45 degree angle and sliding it in a circular motion and a slight force into the second row. You can actually feel a small resistance when it goes into the header. Once properly seated, you can even try to lift it up gently, it shouldn't move out of place or fall to any side from its own weight. Also, you can check pins under the daughterboard: they should be evenly aligned on both sides and almost touching the header's plastic.
JWDB connector on ADPE4S-PB daughterboard


Finally, you can enter BIOS setup and check if three new boot ROM options for LAN interfaces (Addon Intel Lan1 to Lan3) appeared in the Integrated Peripherals -> Onboard Device Function section (not sure if it appears for Realtek based daughterboard as well). In case of SATA daughterboard, it would show it's own BIOS screen for the RAID setup.
New entries in BIOS after inserting AD3INLANG-LF daughterboard

Delock PCI USB/SATA combo card

89140 Delock PCI card combo USB2.0/eSATA/ATA has 1xSATA, 1xESATA, 1xIDE and 4xUSB 2.0 ports. SATA/IDE is based on VIA VT6421A SATA RAID controller and USB 2.0 is managed by VIA Vectro VT6214L USB host controller. Similar to the Marvell controller on ADPE4S-PB daugtherboard, VIA VT6421A doesn't have a built-in support in Arch Linux and requires to load additional kernel module. Some resources were mentioning satavia name, however Arch Linux uses sata_via with the underscore. So I modified the /etc/mkinitcpio.conf file by adding sata_via module to MODULES=(sata_via) line and regenerated initramfs (mkinitcpio -g /boot/initramfs-linux.img). After the reboot, the controller was successfully recognized and it was now possible to boot the OS from it. The USB controller was recognized without any additional configuration though, but it doesn't support loading OS from it (at least, not on JNF76 motherboard). Although, it may seem as a drastic downgrade to already subpar SATA II controller but an SSD performance is still significantly faster than any USB 2.0 flash drive I have used before for the same purpose (it reaches ~80MB/s for writing and reading from my testing). Most importantly I haven't faced SSD initialization issues with it which saves lots of headache on system reboot process. Unfortunately, I can't make a comparison to ADPE4S-PB as I have never done or recorded performance tests for it and I realized that after finishing my current setup only. As mentioned in the previous chapter, reattaching modules is quite a complicated and time-consuming process, so I am not keen to do it just for testing purposes.
Delock PCI USB/SATA combo card

AD3INLANG-LF speed test without link aggregation

As described previously AD3ILANG-LF daughterboard consists of three Intel 82451PI Ethernet controllers. It is a 32-bit 3.3V PCI 2.3 based controller, which supports 33MHz and 66 MHz speeds. Controllers were identified as GI version instead by Linux (the difference is the manufacturing stepping of the controller, where GI is manufactured in B1, PI in C0 stepping). lspci -v output for one of the controllers can be seen below:

04:04.0 Ethernet controller: Intel Corporation 82541GI Gigabit Ethernet Controller (rev 05)
      Subsystem: Intel Corporation PRO/1000 MT Network Connection
      Flags: bus master, 66MHz, medium devsel, latency 32, IRQ 18
      Memory at dfac0000 (32-bit, non-prefetchable) [size=128K]
      Memory at dfaa0000 (32-bit, non-prefetchable) [size=128K]
      I/O ports at 9c00 [size=64]
      [virtual] Expansion ROM at dfa00000 [disabled] [size=128K]
      Capabilities: [dc] Power Management version 2
      Capabilities: [e4] PCI-X non-bridge device
      Kernel driver in use: e1000
      Kernel modules: e1000

While my external Intel PRO/1000GT card uses a 33 MHz interface, all three controllers in the daughterboard are attached to the 66 MHz PCI. Many years ago I thought that Jetway proprietary interface is just a modified conventional PCI but apparently it is bridged to PCI-E interface which allows to combine few PCI interfaces under one connection.

I tested the speed of copying one 1.6 GB size file through samba 4.8 (Arch Linux to Manjaro Linux). My main computer was using 10-Gbit Tehuti 4010 PCI-e x4 rev2 based controller (Edimax EN-9320SFP+) connected to the same router as the NAS server (using 10G SFP+ DAC cable). The hard drive in use was portable Transcend Storejet 500 SSD drive connected to USB 3.0 port (internal reading speed 6.9 GB/s, writing 2 GB/s). On the NAS side TOSHIBA DT01ACA300 3TB hard drive was attached to native VX800 SATA II controller without any RAID setup (reading ~137MB/s, writing ~98.5 MB/s). Both systems were using ext4 filesystem:

Integrated (Realtek) interface: 53.8 MB/s

Inner (left) interface: 80.7 MB/s
Middle interface: 82 MB/s
Outer (right) interface: 80 MB/s

The left and right interfaces of the daughterboard were showing quite a similar constant ~80MB/s speed, while the middle interface was minimally faster at around 82 MB/s. Integrated RTL8111C interface was copying file at 53.8 MB/s speed.

Edimax EN-9320SFP+

Link aggregation

Finally it was the time to setup link aggregation. I enabled the 802.3ad link aggregation feature on my router and was ready to start NAS configuration. However, once I thought that the worse times were behind, I stumbled onto bonding driver configuration issues which led me to try link aggregation on the NetBSD first.

NetBSD

Since I wanted to confirm that my Linux configuration struggles were not caused by the router, I checked if NetBSD supports link aggregation. It appeared that it does and the setup process is relatively easy. As I always have installed NetBSD system on the WD Elements Portable (10A8) USB hard drive (NetBSD 8.0 at the time of testing), I just plugged it in to the system's USB port and booted from it. Thankfully, the system loaded without any issues, but was just relatively slow because of USB 2.0 speed limitations. I was following the official manual page and this article to setup link aggregation. There is no need to recompile the kernel, as the default (GENERIC) amd64 kernel already has enabled agr pseudo-device in its configuration. I literally repeated all the steps from the man page: 
/etc/rc.d/dhcpcd onestop #stop the DHCP client
ifconfig wm0 inet xxx.xxx.xxx.xxx delete
ifconfig wm0 inet6 fe80::xxxx:xxxx:xxxx:xxxx delete
ifconfig wm1 inet xxx.xxx.xxx.xxx delete
ifconfig wm1 inet6 fe80::xxxx:xxxx:xxxx:xxxx delete
ifconfig agr0 create
ifconfig agr0 agrport wm0
ifconfig agr0 agrport wm1 
/etc/rc.d/dhcpcd onestart #start the DHCP client

Once dhcpcd (DHCP client) service started, to my surprise aggregated interface was correctly configured, the router immediately changed aggregation status to enabled. Network was working properly, thus, I could access both my router and the Internet. There was no point to test copying speeds, because USB 2.0 interface was the major bottleneck, however I successfully managed to copy a few files to my main computer using scp protocol. This proved that I was doing something wrong in the Linux environment and that link aggregation actually works between NAS and router.
ifconfig agr0 output

Arch Linux

Arch Linux has a great documentation on many topics in their wiki page. Bonding is not an exception as well. Basically, configuration is not complicated at all: just copy /etc/netctl/examples/bonding file to /etc/netctl/bond0 and configure aggregated interface according to the example. The only difference is to check how your interfaces are called (for example: ip addr list) and replace them in the BindsToInterfaces section accordingly. To be sure that I was configuring the right interface, initially I connected the cable to each of them one by one, and checked which one was configured by DHCP. One additional change was bonding mode. By default Linux uses the round-robin policy instead of the 802.3ad. Therefore, Mode=802.3ad line needs to be added as well. The final configuration looked like this:

 Description="A bonded interface"
 Interface=bond0
 Connection=bond
 BindsToInterfaces=(enp4s6 enp4s4)
 IP=dhcp
 Mode=802.3ad

After that I used netctl enable bond0, netctl start bond0 commands. From the first glance everything seemed fine: new bond0 interface actually appeared, it was up and correct IP was assigned to it. However, pinging to the router was failing and aggregation status was still disabled. It took me two evenings to realize that the problem was dependent on the DHCP client. This article was great in providing additional information on bonding and gave me a hint on troubleshooting the issue. The cause of the failing network was old lease files in /var/lib/dhcpcd folder for aggregated interfaces. Because of this dhcp client was configuring not only bond0 interface but each aggregated interface separately as well. It confused the network and it was failing to route through the right interface. It was enough to delete all *.lease and run dhcpcd client manually for bond0 interface. Since it was properly and automatically configuring bond0 interface even after reboot. Finally network aggegration was working as intended! It can be recognized by the same MAC address between bond0 interface and aggregated ones, IP address assigned only to bond0 interface and "master bond0" on aggregated interface description (ip addr list):

2: enp4s4: mtu 1500 qdisc fq_codel master bond0 state UP group default qlen 1000
    link/ether xx:xx:xx:xx:xx:xx brd ff:ff:ff:ff:ff:ff
3: enp4s6: mtu 1500 qdisc fq_codel master bond0 state UP group default qlen 1000
    link/ether xx:xx:xx:xx:xx:xx brd ff:ff:ff:ff:ff:ff
6: bond0: mtu 1500 qdisc noqueue state UP group default qlen 1000
    link/ether xx:xx:xx:xx:xx:xx brd ff:ff:ff:ff:ff:ff
    inet 192.168.1.2/24 brd 192.168.1.255 scope global noprefixroute bond0
       valid_lft forever preferred_lft forever
    inet6 fe80::230:18ff:fec4:568c/64 scope link
       valid_lft forever preferred_lft forever

Link aggregation speed testing

I performed the same test for the aggregated interface as I did for each NIC controller separately by copying the same 1.6 GB file through samba. To my disappointment, network bonding actually added quite a big additional overhead and was way slower than each interface was performing independently. In general, copying speed was from 58 to 62.5 MB/s which is just about ~10-16% more than the integrated NIC controller and over 20% less than independently working 82541PI controller. Copying 2 files at the same time reduces the speed almost by half for each file so total speed is still basically the same (possibly it's already also a hard drive limitation). According to wikipedia, 802.3ad gives fault tolerance and load balancing, however it does that in expense of performance. If those features are more important than it's worth the hassle, however if speed matters possibly balance-tld or balance-alb modes should be investigated. Unfortunately I didn't have time to play with those modes yet as they need a bit of a different setup (router's link aggregation needs to be actually disabled). If I will do though, I will create a shorter article on that as well.
LEDs of aggregated NICs flashing at the same time

Conclusion

I started this project in my blind belief that bonding will give me bigger speeds, thus I didn't spend enough time on research. Like RAID setup, network aggregation also has different modes for different purposes. The 802.3ad standard is currently the one widely supported by routers. However, it is actually slower than individual interface and provides fault tolerance and load balancing instead, which may or may not be important for your setup. If you are looking to increase your transfer speeds, probably balance-tld mode should be tested. But even in this case, you shouldn't forget that most of the switches, computers and routers are still limited to 1Gbit Ethernet, so even doubling the speed can't actually saturate doubled speed link. Finally, if you are using a magnetic hard drive, they can be a bottleneck as well. Before network bonding setup, you could also possibly consider RAID1+0 setup. In general, the link aggregation feature is not for everyone and you could investigate if it's worth your time, money and hassle. For me, it was mainly an interesting experience and the good reason to fix my outstanding NAS issues. This journey wasn't easy but it gave me valuable information for future configurations and eased me from previous headaches I have suffered from.